Emergencies involving spills can happen when you least expect them. Without the right tools or a clear plan, even a small spill can quickly spiral out of control. That’s where spill containment kits come in. These kits help you act fast, keeping everyone safe and reducing damage.
But why is having a systematic spill response so important? Here’s the thing—without one:
Minor spills can escalate, causing panic and mistakes.
Outdated plans might not cover current risks.
Limited resources can slow down your response.
Human error can lead to missed steps or unreported leaks.
By staying prepared, you can handle spills confidently and avoid unnecessary risks.
Key Takeaways
Check the situation fast. Find out what spilled and how much.
Stay safe first. Wear safety gear (PPE) before touching the spill.
Stop the spill quickly. This stops it from spreading and helps cleanup.
Use absorbent items to control the spill. Pick the right ones for the substance.
Tell someone about the spill and refill your kit after cleaning. This keeps you ready for next time.
Assess the Situation
When a spill happens, your first step is to assess the situation. Acting quickly and carefully can make all the difference in keeping everyone safe and minimizing damage. Let’s break it down.
Identify the Spill
Start by figuring out what you’re dealing with. Is it a chemical, oil, or something else? Check labels, safety data sheets (SDS), or any available documentation. If you’re unsure, treat the spill as hazardous to stay on the safe side.
Next, think about the size of the spill. Is it small enough for you to handle, or does it require professional help? A small puddle of oil might be manageable, but a large chemical spill could need emergency services. Communicate the hazard to those nearby. Let them know what’s happening and, if necessary, evacuate the area. This step ensures everyone stays safe while you prepare your spill response.
Evaluate Risks
Once you’ve identified the spill, it’s time to evaluate the risks. Ask yourself: Could this spill harm people, property, or the environment? For example, a chemical spill near a drain could contaminate waterways, while a slippery oil spill might cause accidents.
Take steps to control the spill and prevent it from worsening. Use personal protective equipment (PPE) to protect yourself. Then, contain the hazard by using absorbent materials or barriers to stop it from spreading. If the situation feels overwhelming, don’t hesitate to call for help. Safety always comes first.
By identifying the spill and evaluating risks, you set the stage for an effective spill response and know which Spill Containment Kits to choose. These steps help you act with confidence and avoid unnecessary dangers.
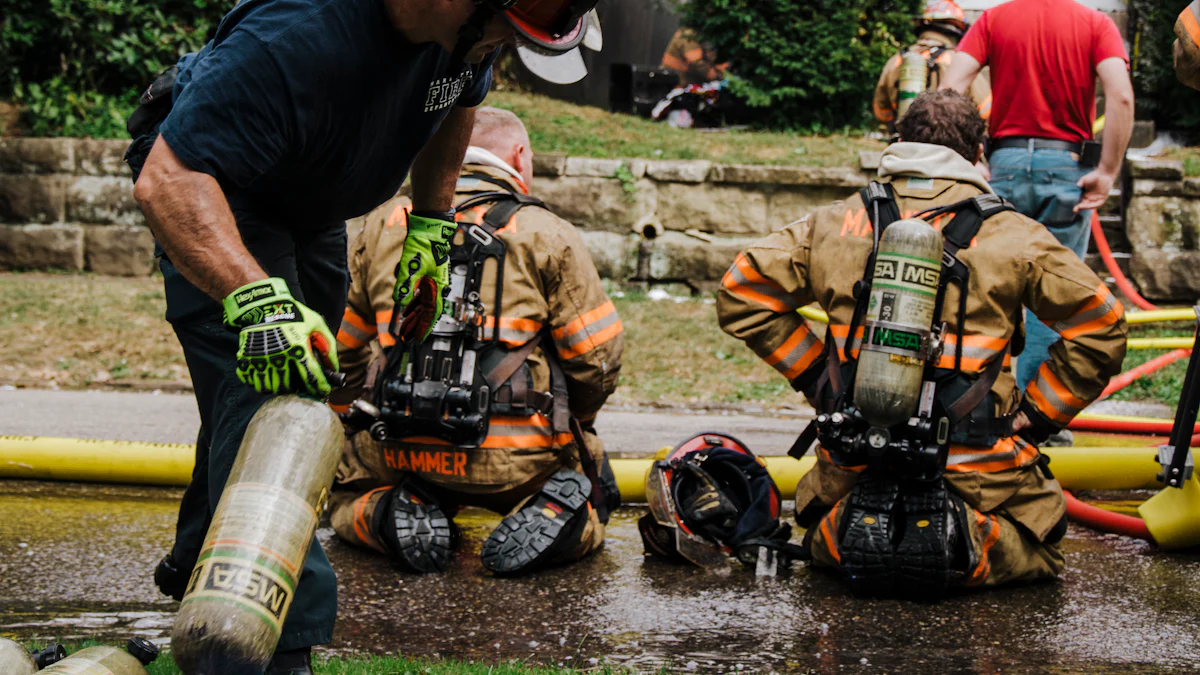
Protect Yourself
When dealing with a spill, your safety comes first. Before you take any action, make sure you’re properly protected and the area is secure. Here’s how you can do it.
Use Personal Protective Equipment (PPE)
You can’t predict what kind of hazards a spill might bring, so wearing the right gear is essential. Personal protective equipment (PPE) shields you from harmful substances and reduces the risk of injury. Depending on the spill, you might need different types of PPE.
Here’s a quick list of what to consider:
Respiratory protection: Masks or respirators to avoid inhaling toxic fumes.
Eye and face protection: Goggles or face shields to guard against splashes.
Hand protection: Chemical-resistant gloves to keep your hands safe.
Foot protection: Boots or shoe covers to prevent contact with hazardous materials.
Chemical protective clothing (CPC): Hooded suits, protective sleeves, or disposable covers for full-body protection.
For high-risk spills, you may need a full hazmat suit, also called a PPE ensemble. These come in four levels, from A (maximum protection) to D (basic protection). Always choose the right level based on the spill’s severity.
Tip: Check your spill kit for PPE before an emergency happens. Make sure everything fits and is in good condition.
Secure the Area
Once you’re protected, focus on keeping others safe. A spill can quickly become dangerous if people wander into the area or the substance spreads. Follow these steps to secure the site:
Prevent the spread: Use absorbent materials, spill containment booms, or barriers to stop the spill from spreading further.
Establish a perimeter: Clear the area of unnecessary personnel and set up a boundary to block access. Use cones, tape, or signs to mark the danger zone.
Notify the right people: Inform your internal response team or emergency services about the spill. Provide details like the type of substance and its location.
Control the source: If it’s safe, stop the spill at its source. For example, turn off a leaking valve or upright a tipped container.
By securing the area, you reduce the risk of accidents and make it easier to manage the spill. Remember, your safety and the safety of others should always come first.
Note: Never attempt to secure a spill without proper PPE. Protecting yourself is the first step to protecting others.
Stop the Spill

When a spill occurs, stopping it at the source is your next priority. Acting quickly can prevent the situation from getting worse and make cleanup easier.
Control the Source
The first step in spill control is identifying where the spill is coming from. Once you know the source, take immediate action to stop it. Here’s how you can do it:
Shut off valves: If the spill is from a tank or pipeline, locate and close the valves. This stops the flow and prevents further contamination.
Stop the flow: For spills like oil or chemicals, cutting off the source is critical. Whether it’s a leaking container or a broken pipe, act fast to contain the spill.
If you’re dealing with a chemical spill, always prioritize safety. Use the right tools from your spill containment kit to handle the situation effectively. For example, absorbent pads or booms can help you control the spread while you work on stopping the source.
Tip: Keep a checklist of common spill sources in your workplace. This helps you respond faster during emergencies.
Prevent Escalation
Once you’ve stopped the source, focus on keeping the spill from spreading. A small spill can quickly turn into a bigger problem if it reaches drains, waterways, or sensitive areas.
Here are some steps to prevent escalation:
Use barriers: Deploy spill containment booms or absorbent socks around the spill. These create a physical barrier to stop the substance from spreading.
Protect drains: Cover nearby drains with drain seals or mats. This prevents hazardous materials from entering the water system.
Act fast: Time is critical. The quicker you act, the less damage the spill can cause.
By controlling the source and preventing escalation, you take charge of the situation. These steps are essential for effective spill control and minimizing risks to people and the environment.
Contain the Spill by proper Spill Containment Kits
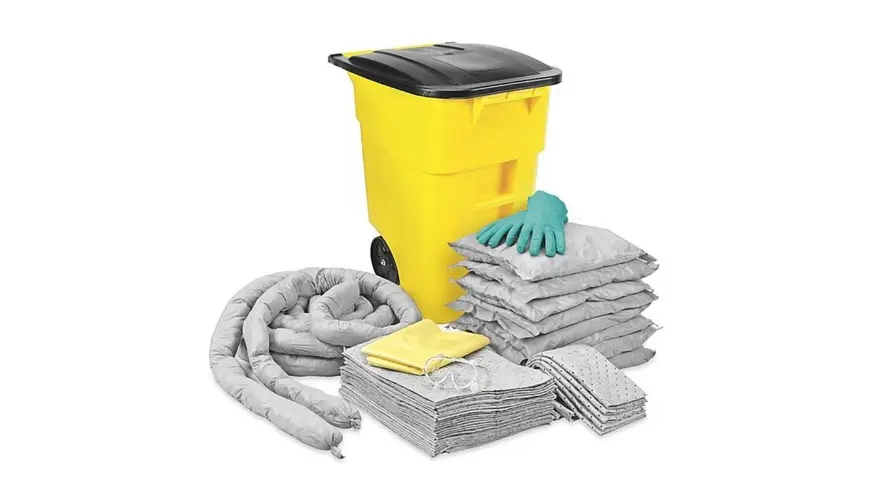
Once you’ve stopped the source of the spill, your next step is to contain it. This prevents the spill from spreading further and causing more harm. Let’s dive into how you can do this effectively.
Deploy Absorbent Materials
Absorbent materials are your best friends when it comes to containing spills. They soak up liquids quickly and help you regain control of the situation. But not all absorbents are created equal. Choosing the right one depends on the type of spill you’re dealing with.
Here’s a quick guide to help you pick the right material:
Material | Description |
|---|---|
Polypropylene | Lightweight, highly absorbent, ideal for oil and chemical spills. |
Cellulose | Eco-friendly, effective for general-purpose spills including water and oils. |
Clay | Cost-effective, good for rough surfaces, absorbs well. |
Natural Fibers | Biodegradable, excellent absorbency, suitable for eco-conscious operations. |
Superabsorbent Polymers | High-capacity absorption for extreme scenarios like chemical spills. |
Synthetic absorbents, like polypropylene, are great for chemical spills because they’re durable and highly effective. Organic absorbents, such as natural fibers, are biodegradable and better for the environment.
Tip: Keep a mix of absorbent materials in your spill containment kit. This ensures you’re ready for any type of spill, whether it’s oil, water, or chemicals.
Protect Drains and Waterways
Spills near drains or waterways can escalate quickly, causing environmental damage. You need to act fast to block the spill from reaching these sensitive areas.
Here are some strategies to protect drains and waterways:
Investigate storage containers, tanks, and machines regularly to prevent leaks.
Place drain covers over nearby drains to stop spills from entering the water system.
Use absorbent mats, pads, or socks around machines and storage tanks as a precaution.
By combining these proactive and reactive measures, you can minimize the impact of a spill on the environment. Always prioritize protecting drains during your spill response.
Remember: A small spill can have a big impact if it reaches a waterway. Taking quick action can make all the difference.
Clean Up the Spill
Once you’ve contained the spill, it’s time to clean up the mess. This step is crucial to restore safety and prevent further harm. Let’s break it down into two key actions.
Remove Contaminated Materials
Start by gathering all the materials you used to contain or neutralize the spill. This includes absorbent pads, booms, and any tools that came into contact with the substance. Handle these items carefully to avoid spreading contamination.
Follow these steps to remove contaminated materials safely:
Collect all used absorbents and tools immediately after containing the spill.
Place them in appropriate, clearly labeled containers. Make sure these containers meet Department of Transportation (DOT) standards.
Double-check the area to ensure no residue or hazardous material remains.
Document the entire process. Write down what was spilled, how it was cleaned up, and the materials you collected. This record will help you comply with regulations and improve your spill response plan for the future.
Tip: Always refer to the Safety Data Sheets (SDS) for specific instructions on handling and cleaning up chemical spills. These sheets provide essential details about the substance and its risks.
Dispose of Waste Safely
Proper disposal of spill waste is just as important as the cleanup itself. Mishandling hazardous waste can lead to environmental damage and legal penalties.
Here’s how you can dispose of waste safely:
Label all waste containers with Hazardous Waste stickers and identify the chemicals inside.
Work with a licensed hazardous waste disposal company to transport and dispose of the materials.
Ensure the waste is delivered to a certified treatment, storage, and disposal facility (TSDF).
Keep detailed records of the entire process, including hazardous waste manifests, for at least three years.
Follow Environmental Protection Agency (EPA) guidelines and consult the SDS for additional disposal instructions. Some waste may require special treatment, so don’t skip this step.
By removing contaminated materials and disposing of waste properly, you complete the spill cleanup process responsibly. These actions protect the environment and ensure your workplace is safe for normal operations.
Remember: Waste minimization is key. Use only what’s necessary during cleanup to reduce the amount of hazardous waste you generate.
Decontaminate
After cleaning up the spill, you’re not done yet. Decontamination is the final step to ensure the area and equipment are safe for use again. This process removes any lingering hazardous substances and prevents future risks.
Clean the Area
Start by focusing on the affected area. Cleaning it thoroughly ensures no harmful residue remains. Use cleaning agents and methods that match the type of spill. For example, oil spills require degreasers, while chemical spills might need neutralizers. Always check the Safety Data Sheets (SDS) for guidance on the right cleaning products.
Here’s how you can approach it:
Use absorbent wipes or mops to remove any leftover liquid.
Apply the appropriate cleaning agent to the surface. Tailor your choice to the contaminant.
Scrub the area gently but thoroughly. This helps break down stubborn residues.
Rinse the surface with water or a neutralizing solution to remove any remaining cleaner.
Tip: Ventilate the area during and after cleaning. Proper airflow helps clear out fumes and speeds up drying.
By cleaning the area properly, you eliminate potential hazards and restore safety.
Decontaminate Equipment
The tools and equipment you used during the spill response also need attention. Contaminated gear can spread hazardous substances if not cleaned correctly. Follow these best practices to decontaminate your equipment:
Initial Rinse: Start by rinsing the equipment with water or a decontamination solution. This removes surface contaminants.
Physical Removal: Use brushes or scrapers to get rid of any stuck-on material.
Apply Decontamination Solutions: Choose a solution that matches the contaminant. For example, solvents work well for oils, while neutralizers handle acids or bases.
Agitation and Scrubbing: Scrub the surfaces with the solution to ensure thorough cleaning.
Secondary Rinse: Rinse the equipment again to wash away any remaining solution or residue.
Inspection and Testing: Check the equipment visually. If needed, use swabs or wipes to confirm it’s clean.
Note: Always wear PPE while decontaminating equipment. This protects you from exposure to harmful substances.
By following these steps, you keep your tools in good condition and ready for future use. Proper decontamination also ensures your workplace stays safe and compliant with regulations.
Post-Incident Actions
After handling a spill, your job isn’t over yet. Taking the right steps after the incident ensures your workplace stays safe and prepared for the future. Let’s dive into what you need to do next.
Report the Incident
Reporting the spill is a crucial step. It helps your team learn from the incident and prevents similar situations in the future. Start by documenting everything. Write down what happened, how the spill occurred, and the actions you took to manage it. Include details like the type of substance, the amount spilled, and the cleanup process.
If your workplace has an incident report form, fill it out completely. Be as specific as possible. This information is valuable for improving your spill response plan and training.
Don’t forget to notify the appropriate authorities if required. Some spills, especially those involving hazardous materials, must be reported to local or federal agencies. Check the regulations in your area to ensure compliance.
Tip: Keep a log of all incidents, even minor ones. Tracking these events helps you identify patterns and address potential risks before they escalate.
Restock and Review
Once the spill is cleaned up, it’s time to restock your spill containment kit and review your response. This step ensures you’re ready for the next emergency.
Follow these key steps to restock and review effectively:
Replace all materials used during the spill response. This includes absorbent pads, booms, and any other items from your kit.
Conduct routine maintenance checks on your spill response tools. Make sure everything is in good condition and easy to access.
During audits, confirm that all tools are accounted for. Inspect each item to ensure it’s functional and ready for use.
Take a moment to evaluate your team’s response. What went well? What could be improved? Use this opportunity to update your spill response plan and provide additional training if needed.
Remember: A well-stocked and maintained spill kit is your first line of defense. Regular checks keep you prepared for whatever comes your way.
By reporting the incident and restocking your kit, you close the loop on your spill response. These actions not only protect your workplace but also help you handle future spills with confidence.
Handling emergencies with spill containment kits doesn’t have to feel overwhelming. By following a clear process, you can manage spills effectively and keep everyone safe. Remember these key steps: assess the situation, protect yourself, stop the spill, contain it, clean up, and decontaminate. Each step plays a vital role in ensuring a successful spill response.
Preparation is your best defense. Regularly inspect your spill containment kits to ensure they’re fully stocked and in good condition. Here’s a quick checklist to keep your kits ready:
Check your kits monthly to confirm all materials are intact.
Replace used or expired items immediately.
Inspect absorbent socks for damage and maintain a supply of PPE.
Train your team regularly on spill response techniques.
Conduct emergency drills to boost confidence and readiness.
Training is just as important as preparation. Programs like the Emergency Management Institute or the National Fire Academy offer valuable resources to improve your team’s skills. These programs teach everything from handling a chemical spill to managing large-scale emergencies.
Staying calm during a spill is crucial. With the right tools, training, and mindset, you can tackle any spill confidently. Don’t forget to restock your kits after every use and review your response plan to improve for the future. A little preparation goes a long way in protecting your workplace and the environment.
FAQ for Spill Containment Kits
What should I do if I don’t know what the spilled substance is?
If you’re unsure, treat the spill as hazardous. Use PPE and follow general safety protocols. Check for labels or Safety Data Sheets (SDS) nearby. If you can’t identify it, call a professional spill response team for help. Safety always comes first.
How often should I inspect my spill containment kits?
Inspect your kit monthly. Look for expired items, damaged tools, or missing materials. Replace anything that’s been used or is no longer functional. Regular checks ensure your kit is always ready for emergencies.
Can I reuse absorbent materials from the kit?
No, you shouldn’t reuse absorbent materials. Once they’ve soaked up a spill, they’re considered contaminated. Dispose of them according to local hazardous waste regulations. Reusing them could spread the spill or create additional risks.
What’s the best way to train my team for spill emergencies?
Hold regular training sessions and practice drills. Teach your team how to use the spill kit, wear PPE, and follow the response plan. Online courses or local safety organizations can also provide valuable resources for hands-on learning.
Do I need different Spill Containment Kits for different types of spills?
Yes, it’s a good idea. General-purpose kits work for non-hazardous spills, but chemical or oil spills need specialized kits. Check your workplace risks and stock kits accordingly. Having the right tools makes cleanup faster and safer.
Tip: Label your kits clearly so your team knows which one to grab during an emergency.
See Also
Evaluating UPQUARK Marine Absorbents for Effective Oil Spill Management
Helpful Guidelines for Users of Oil-Only Absorbent Socks