
Workplace safety starts with controlling hazardous energy. Every year, compliance with lockout tagout standards saves around 120 lives and prevents 50,000 injuries. These procedures protect you from risks like electrical shocks, moving machinery, and pressurized systems. Without proper lockout and tagout practices, accidents can happen in seconds. For example, Massachusetts has seen a 107% rise in fatal workplace injuries over the past decade. By following a structured process, you ensure equipment stays off and workers stay safe. It’s not just a rule—it’s a lifesaver.
Key Takeaways
Lockout tagout steps keep people safe by stopping dangerous energy during repairs.
Always tell workers before starting lockout tagout to ensure clear communication and safety.
Shut off all energy sources and use locks to stop machines from turning on accidentally.
Check that energy is off before working to make sure no danger remains.
Regular training and checks are important to follow rules and keep everyone safe.
Understanding Lockout Tagout

What is Lockout Tagout?
Lockout tagout is a safety procedure designed to protect you and your coworkers from hazardous energy during equipment maintenance or servicing. It involves isolating energy sources and securing them with locks and tags to prevent accidental reactivation. Think of it as a safeguard that ensures machinery stays off until it’s safe to use again. Whether you’re dealing with electrical, mechanical, or hydraulic systems, lockout tagout keeps you out of harm’s way.
In the U.S., OSHA defines lockout tagout under standard 29 CFR 1910.147. This regulation requires employers to implement energy control programs, train employees, and use proper lockout devices during maintenance. These steps ensure that everyone on the team understands the risks and follows the same safety protocols.
Why is Lockout Tagout Important for Safety?
Imagine working on a machine, and it suddenly powers up. That’s the kind of accident lockout tagout prevents. Hazardous energy, like electricity or pressurized systems, can cause severe injuries or even fatalities. By isolating energy sources, you eliminate the risk of unexpected startups or energy releases.
Lockout tagout procedures are especially critical in industries like manufacturing, healthcare, and construction. For example, manufacturing focuses on isolating electrical and mechanical energy, while healthcare tailors procedures for medical equipment. Regardless of the industry, the goal remains the same: protecting you and your coworkers from harm.
Key Elements of a Lockout Tagout Program
A successful lockout tagout program includes several key components:
A written lockout tagout policy specific to your workplace.
Employee training to ensure everyone knows how to follow the procedures.
Identification of energy sources and isolation points.
Proper use of lockout and tagout devices.
Regular inspections and audits to maintain compliance.
Employers must also develop equipment-specific procedures and provide step-by-step instructions for isolating energy. These measures ensure that every piece of machinery is handled safely and consistently.
Key Element | Description |
|---|---|
Employers must develop and maintain written procedures specific to each piece of equipment. | |
Employee Training | All employees involved must receive proper training on LOTO procedures and potential hazards. |
Periodic Inspections | Employers must conduct inspections of lockout procedures at least annually. |
Proper Use of LOTO Devices | Energy isolating devices must be durable and substantial enough to prevent removal without tools. |
Energy Control Program | Employers must establish a program covering all aspects of lockout tagout. |
By following these guidelines, you can create a safer work environment and reduce the risk of accidents caused by hazardous energy.
Step-by-Step Lockout Tagout Procedure
Step 1: Notify Affected Employees
Before starting any lockout tagout procedure, you need to inform everyone who might be affected. This includes operators, maintenance staff, and anyone working near the equipment. Clear communication ensures everyone knows the equipment will be shut down and why. It also prevents accidental interference during the process.
A quick meeting or announcement works well for this step. Let your team know the timeline and what tasks will be performed. If your workplace has a notification system, use it to send alerts. Remember, keeping everyone in the loop reduces confusion and keeps the work environment safe.
Tip: Always document who has been notified. This creates a record and ensures no one is left out.
Step 2: Prepare for Equipment Shutdown
Preparation is key to a smooth lockout process. Start by identifying all energy sources connected to the equipment. These could include electrical, hydraulic, pneumatic, mechanical, chemical, or thermal energy. Each type of energy requires specific steps to neutralize it safely.
Here’s what you’ll need to prepare:
Tags that explain who applied the lock and why.
Circuit testers or grounding wires to confirm energy is off.
Proper lockout devices that fit the equipment.
Follow these steps to get ready:
Review the equipment manual for shutdown instructions.
Notify affected personnel about the shutdown.
Assess potential hazards and gather the necessary tools and PPE.
By preparing thoroughly, you minimize risks and ensure the lockout tagout procedure goes smoothly.
Step 3: Shut Down the Equipment
Once you’ve prepared, it’s time to shut down the equipment. Follow the manufacturer’s instructions for a safe shutdown. This step might involve turning off switches, closing valves, or pressing emergency stop buttons.
Make sure the shutdown is complete before moving on. Double-check that all moving parts have stopped and that no energy is flowing. If the equipment has multiple energy sources, confirm each one is off.
Pro Tip: Always verify the shutdown visually and, if possible, with testing equipment. This ensures no hazardous energy remains active.
Shutting down the equipment properly is a critical step. It sets the foundation for isolating energy sources and applying lockout devices effectively.
Step 4: Isolate Energy Sources
Now that the equipment is shut down, it’s time to isolate all energy sources. This step ensures no hazardous energy can reach the equipment while you’re working on it. You’ll need to locate and disconnect every energy source connected to the machinery. These could include electrical circuits, hydraulic lines, pneumatic systems, or even gas valves.
Here’s how you can isolate energy sources effectively:
Identify all energy isolation points: Check the equipment manual or energy control procedures for guidance.
Turn off energy controls: Flip switches, close valves, or disconnect power supplies.
Secure isolation points: Use physical barriers like disconnect switches or valve covers to block energy flow.
Tip: Always double-check that every energy source is isolated. Missing even one could lead to dangerous situations.
Isolation is a critical part of the lockout tagout process. It prevents energy from accidentally reactivating the equipment, keeping you and your team safe.
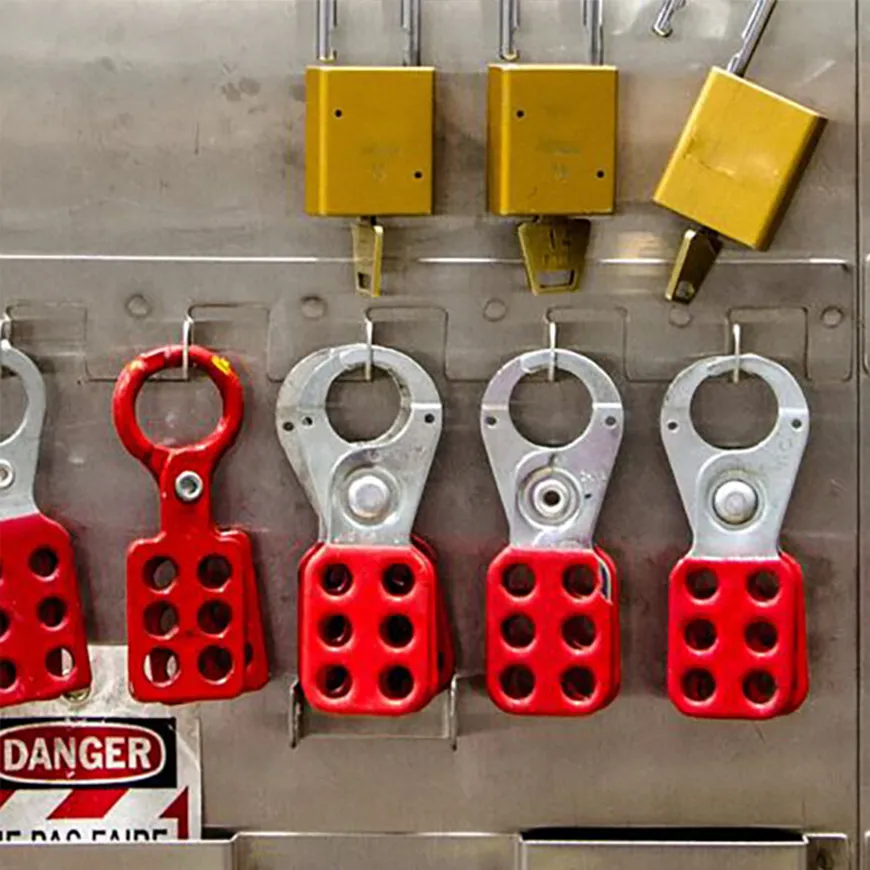
Step 5: Apply Lockout Tagout Devices
Once you’ve isolated the energy sources, it’s time to apply lockout tagout devices. These devices physically secure the isolation points and warn others not to tamper with them. Each worker should use their own lock and tag to ensure accountability.
Follow these steps to apply the devices:
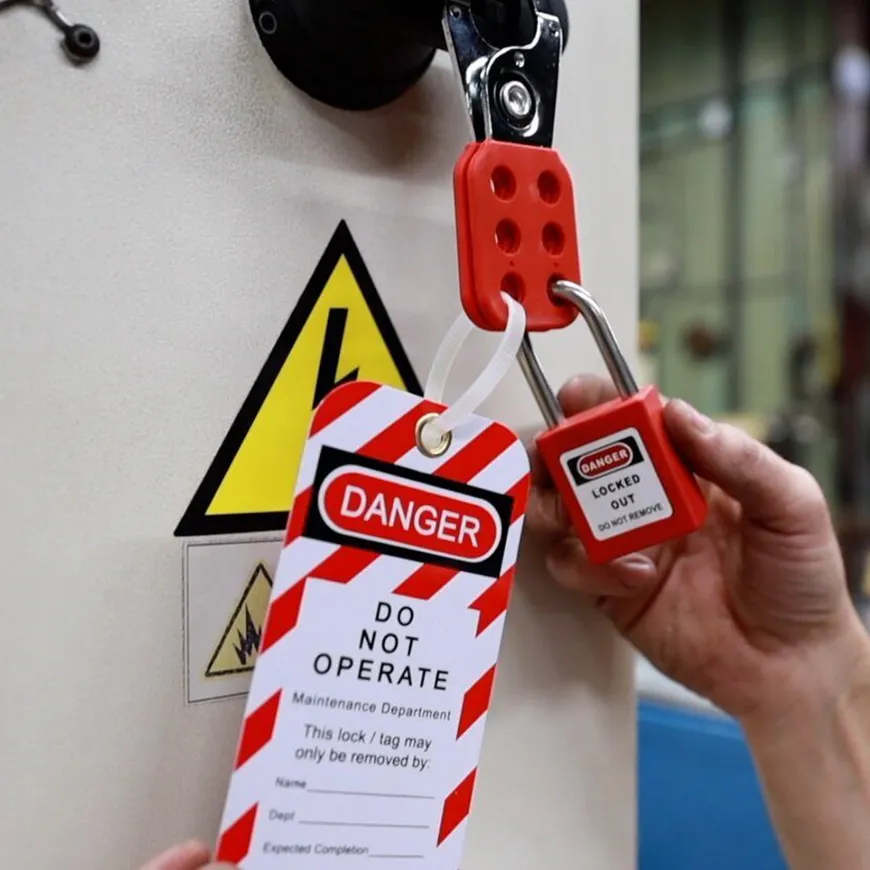
Attach locks: Place a lock on each isolation point. Make sure only the person performing the maintenance has the key.
Add tags: Attach a tag to each lock. The tag should include your name, the date, and the reason for the lockout.
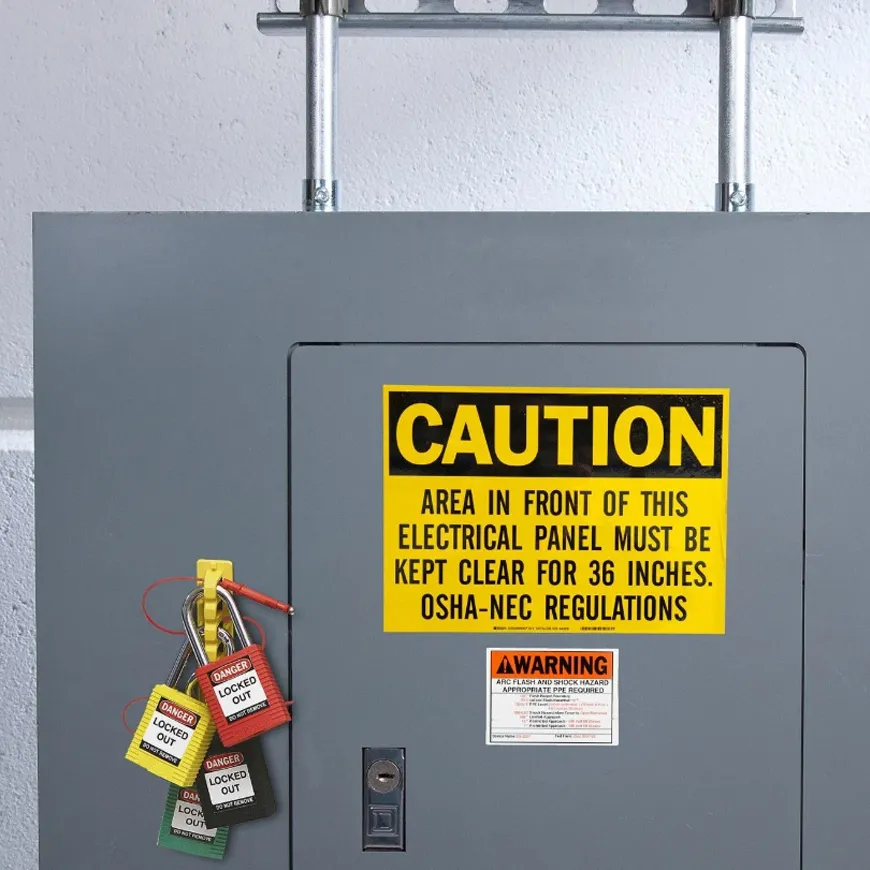
Use proper devices: Choose lockout devices that fit securely on the equipment. For example, use circuit breaker locks for electrical panels or valve lockouts for pipes.
Note: Never share your lock key with anyone. This ensures only you can remove the lock when the job is done.
Applying lockout and tagout devices is like putting up a “Do Not Enter” sign. It’s a clear signal that the equipment is off-limits until it’s safe to use again.
Step 6: Release Stored Energy
Even after isolating energy sources, some hazardous energy might still be stored in the equipment. This could include pressure in hydraulic lines, tension in springs, or heat in thermal systems. You need to release this stored energy to make the equipment completely safe.
Here’s how you can release stored energy:
Relieve pressure: Open valves or bleed lines to release trapped pressure.
Discharge electrical energy: Use grounding wires or circuit testers to ensure no electricity remains.
Neutralize mechanical energy: Secure moving parts or release spring tension.
Pro Tip: Always wear the appropriate personal protective equipment (PPE) when releasing stored energy. This protects you from unexpected hazards.
Releasing stored energy is the final step before you can safely begin maintenance. It ensures no hidden dangers remain in the equipment.
Step 7: Verify Energy Isolation
Before you start working on the equipment, you need to confirm that all energy sources are completely isolated. This step ensures no hazardous energy remains that could harm you or your team. Skipping this step could lead to serious accidents, so take your time and do it right.
Here’s how you can verify energy isolation:
Test the equipment: Try to turn it on using the normal operating controls. If it doesn’t power up, that’s a good sign.
Use testing tools: For electrical systems, use a voltage tester to confirm there’s no electricity flowing.
Double-check isolation points: Inspect all locks and tags to make sure they’re secure and in place.
Tip: Always test the equipment in the presence of everyone involved. This keeps everyone on the same page and avoids confusion.
Verification is your final safety check before maintenance begins. It’s like double-locking your door before leaving home—you can never be too careful.
Step 8: Perform Maintenance or Servicing
Now that you’ve verified the equipment is safe, you can begin your work. Whether you’re repairing, cleaning, or inspecting, this is the step where you get the job done.
While performing maintenance, keep these safety tips in mind:
Stay alert: Always be aware of your surroundings and any potential hazards.
Follow procedures: Stick to the maintenance guidelines provided by the manufacturer.
Communicate: Let your team know what you’re doing and if you encounter any issues.
Note: If you need to test the equipment during servicing, follow the lockout tagout procedure again to ensure safety.
This step is where your preparation pays off. With all energy sources isolated and verified, you can focus on your work without worrying about unexpected dangers.
Step 9: Remove Lockout Tagout Devices and Restore Power
Once the maintenance is complete, it’s time to bring the equipment back online. But don’t rush—removing lockout tagout devices requires just as much care as applying them.
Follow these steps to safely restore power:
Inspect the equipment: Make sure all tools and materials are removed, and the equipment is ready to operate.
Notify affected employees: Let everyone know the maintenance is complete and the equipment will be powered up.
Remove locks and tags: Only the person who applied the lockout devices should remove them. This ensures accountability.
Restore energy sources: Reconnect power, open valves, or re-engage switches as needed.
Pro Tip: After restoring power, monitor the equipment to ensure it’s functioning correctly and safely.
Removing lockout and tagout devices is the final step in the process. By following these steps, you ensure a smooth transition back to normal operations while keeping everyone safe.
Common Mistakes in Lockout Tagout
Skipping Critical Steps in the Procedure
Skipping steps in the lockout tagout process can lead to serious consequences. For example, failing to verify energy isolation might leave hazardous energy active, putting you at risk of injury. Some workers also skip releasing stored energy, which can result in unexpected equipment movement or pressure release. These oversights often happen when procedures aren’t clearly written or when employees aren’t properly trained.
To avoid this, always follow the procedure step by step. Make sure your workplace has detailed, written instructions for each piece of equipment. If you’re unsure about a step, ask for clarification. Remember, taking shortcuts might save time, but it’s not worth the risk to your safety.
Tip: Regularly review and update lockout tagout procedures to ensure they cover all potential hazards.
Poor Communication with Employees
Communication breakdowns during lockout tagout can create confusion and accidents. Imagine starting maintenance on a machine, only to find out someone else re-energized it because they weren’t informed. That’s a disaster waiting to happen.
You can prevent this by keeping everyone in the loop. Notify all affected employees before applying lockout devices. Let them know what equipment is being worked on and when it will be safe to use again. During the process, communicate any changes in the equipment’s status. Also, document every step to maintain accountability and compliance.
Pro Tip: Use team meetings or workplace communication tools to ensure everyone understands the lockout process.
Using Incorrect Lockout Tagout Devices
Using the wrong lockout or tagout devices can compromise safety. For instance, a poorly fitting lock might allow unauthorized access, leading to accidental equipment activation. Similarly, using a tag that doesn’t clearly display your name or the reason for the lockout can cause confusion.
To mitigate these risks, always choose devices designed for the specific equipment you’re working on. Ensure locks are durable and tags are easy to read. Proper training is also essential. You need to understand the hazards and how to apply the right devices effectively.
Note: Never use makeshift tools like zip ties or tape as substitutes for proper lockout devices. They don’t provide the same level of protection.
Failing to Verify Energy Isolation
Failing to verify energy isolation is one of the most dangerous mistakes you can make during a lockout tagout procedure. Imagine thinking a machine is safe to work on, only to have it suddenly power up. That’s a nightmare scenario you want to avoid at all costs. Verifying energy isolation isn’t just a step—it’s your final safety check before you start working.
Here’s how you can avoid this mistake:
Test the equipment: Try turning it on using its normal controls. If it doesn’t start, that’s a good sign.
Use testing tools: For electrical systems, grab a voltage tester to confirm there’s no electricity flowing.
Inspect locks and tags: Double-check that all locks and tags are still in place and secure.
Tip: Always perform these checks in front of your team. This keeps everyone informed and avoids any miscommunication.
Skipping this step often happens when you’re in a rush or feeling overconfident. But taking a few extra minutes to verify isolation can save lives. It’s like checking both ways before crossing the street—you wouldn’t skip that, right?
Remember, hazardous energy can be sneaky. Even if you’ve isolated the main power source, stored energy like pressure or heat might still linger. Always double-check. It’s better to be overly cautious than to risk an accident.
Lack of Proper Training and Documentation
Without proper training and documentation, lockout tagout procedures can quickly fall apart. If you don’t know what to do or don’t have clear instructions, mistakes are almost guaranteed. That’s why training and documentation are the backbone of any successful lockout tagout program.
Here’s what you need to focus on:
Comprehensive training: Make sure every employee understands the procedure, the risks, and how to use the equipment.
Clear documentation: Provide step-by-step instructions for isolating energy sources on each machine.
Regular refreshers: Offer periodic training sessions to keep everyone up to date.
Pro Tip: Use visual aids like diagrams or videos in your training. They make complex procedures easier to understand.
When training is lacking, workers might skip steps or use the wrong tools. Poor documentation can also lead to confusion, especially for new employees. Both issues increase the risk of accidents.
Think of training as your first line of defense. When everyone knows what to do, the entire process runs smoothly. And with proper documentation, you’ll always have a reliable reference to fall back on. Don’t underestimate the power of preparation—it’s what keeps you and your team safe.
Ensuring Compliance and Training
OSHA Standards for Lockout Tagout
To keep your workplace safe, you need to follow OSHA’s lockout tagout standards. These rules ensure that hazardous energy is controlled during maintenance. OSHA requires you to create an energy control program and use authorized lockout devices. Every piece of equipment must have lockout capabilities, especially new or refurbished ones. Employees also need proper training to understand the procedures and risks.
Here’s a quick breakdown of OSHA’s key requirements:
Requirement | Description |
|---|---|
Energy control programs | Employers must create and enforce programs for energy control. |
Lockout devices | Lockout devices must be used at every point during repair and maintenance. |
Authorized devices | All devices must be authorized and protective. |
New equipment lockouts | New or refurbished equipment must have lockout capabilities. |
Proper training | Employees must receive adequate training on lockout and tagout procedures. |
User identification | Correct user identification must be used for unlocking procedures. |
Yearly training | Annual training must be provided for employees. |
Inspections | Regular inspections of lockout and tagout devices and policies are required. |
By following these standards, you can avoid accidents and hefty OSHA fines. Plus, it helps build a strong safety culture in your workplace.
Developing a Lockout Tagout Program
Creating a lockout tagout program might seem overwhelming, but breaking it into steps makes it manageable. Start by assessing your current procedures. Identify all equipment that needs lockout measures. Then, develop clear policies with input from your team. This ensures the program fits your workplace’s needs.
Here’s a step-by-step guide to get started:
Conduct a comprehensive assessment of your equipment and existing procedures.
Develop and document a lockout tagout program with clear policies.
Write specific procedures for each machine or task.
Provide training to ensure everyone understands the program.
Perform regular audits to check compliance and improve where needed.
A well-designed program not only keeps you compliant but also reduces risks. It’s an investment in your team’s safety and your company’s future.
Training Employees on Lockout Tagout Procedures
Training is the backbone of any successful lockout tagout program. Without it, even the best procedures can fail. You need to ensure every employee understands how to follow the steps and why they’re important. This includes knowing how to use lockout devices and recognizing potential hazards.
Here’s how you can make training effective:
Use hands-on demonstrations to show how to apply locks and tags.
Provide visual aids like diagrams or videos for better understanding.
Offer refresher courses annually to keep everyone up to date.
Tip: Tailor training to specific roles. Maintenance workers need detailed instructions, while operators need to know when to stay clear.
When employees are well-trained, they’re more likely to follow procedures correctly. This reduces accidents and keeps your workplace running smoothly.
Conducting Regular Inspections and Audits
Regular inspections and audits are essential for keeping your lockout tagout program effective and compliant. They help you identify gaps, ensure procedures are followed, and improve workplace safety. Think of them as your safety check-ups—they keep everything running smoothly and prevent accidents.
Why Are Inspections and Audits Important?
When you conduct inspections, you’re making sure everyone follows the lockout tagout procedures correctly. Audits, on the other hand, help you evaluate the overall program. Together, they ensure your team stays safe and your workplace meets OSHA standards. Skipping these steps can lead to overlooked hazards or outdated practices.
Tip: Treat inspections as a learning opportunity. They’re not just about finding mistakes—they’re about improving safety for everyone.
How to Conduct Effective Inspections
Follow these steps to make your inspections thorough and efficient:
Review Procedures: Check if the written lockout tagout procedures match what’s happening on the floor.
Observe Employees: Watch how workers apply locks and tags. Are they following the steps?
Inspect Devices: Look at the condition of locks, tags, and other equipment. Replace anything worn or damaged.
Document Findings: Write down what you observe. Highlight areas that need improvement.
Pro Tip: Involve employees in the inspection process. Their feedback can reveal issues you might miss.
Scheduling Audits
Plan audits at least once a year. During an audit, review your entire lockout tagout program. Check if it aligns with OSHA standards and your workplace needs. Update procedures if you’ve added new equipment or identified new hazards.
Note: Consistency is key. Regular audits show your commitment to safety and help build trust with your team.
By staying proactive with inspections and audits, you create a safer environment and ensure your lockout tagout program stays effective.
Lockout tagout procedures are more than just a safety requirement—they’re a commitment to protecting lives. By following these steps, you create a safer workplace where accidents caused by hazardous energy are less likely to occur. Proper training and adherence to OSHA standards play a huge role in this. They not only reduce injuries but also save costs and improve operational efficiency.
When you implement lockout and tagout procedures effectively, you’re not just following rules—you’re building a culture of safety. This culture protects your team, enhances your company’s reputation, and ensures long-term success. So, take the time to train your employees, inspect your processes, and make safety a priority every day.
FAQ
What is the difference between lockout and tagout?
Lockout uses physical locks to prevent equipment from being powered on. Tagout involves attaching warning tags to energy isolation points. While tags warn others, locks physically block energy sources. For maximum safety, you should always combine both methods.
Tip: Think of locks as barriers and tags as reminders. Together, they’re more effective! 🔒📋
Who is responsible for removing lockout devices?
Only the person who applied the lock can remove it. This ensures accountability and prevents accidental reactivation. If that person isn’t available, follow your company’s emergency removal procedures.
Note: Never remove someone else’s lock without proper authorization. It’s a serious safety risk.
How often should lockout tagout training be conducted?
You should provide training at least once a year. However, new employees or those working with new equipment need immediate training. Regular refreshers help everyone stay sharp and compliant.
Pro Tip: Use hands-on demonstrations during training. It makes the process easier to understand. 🛠️
Can lockout tagout procedures be skipped for quick repairs?
No, skipping lockout tagout is never safe. Even quick repairs can expose you to hazardous energy. Always follow the procedure, no matter how small the task seems.
Reminder: Safety first! Taking shortcuts can lead to serious injuries or worse. 🚨
What should you do if you find a missing lock or tag?
Stop immediately and report it to your supervisor. Missing locks or tags mean the equipment might not be safe. Never assume it’s okay to proceed without verifying energy isolation.
Alert: Treat missing locks or tags as a red flag. Double-check before continuing. ⚠️
See Also
Essential Tips for Using Oil-Only Absorbent Socks Effectively
Evaluating UPQUARK Marine Absorbents for Effective Oil Spill Response
An In-Depth Overview of Oil-Only Absorbent Pillows
Selecting Ideal Universal Absorbent Socks for Your Business Needs